After having Sushi I wanted to go home and learn how to make it. Ami has made Sushi before so i asked if she wouldn't mind teaching me the art. A little disclaimer: We don't have a sushi roller so we improvised and just did it with our hands, which means our rolls weren't as tight as they could have been if we had the proper equipment. We also have no training and so the steps listed below are in no way professional steps, just the steps we took.
Here goes our Sushi Adventure
We stuck with two different kinds of rolls to make it easier ( and less expensive!) on ourselves.
Rolls
California Roll
Small Package of imitation Crab Meat
Mayonnaise
Avocado
Rice (sticky white)
Seaweed Wrap
Rice Wine Vinegar
Philadelphia Roll
Smoked Salmon ( Or fresh if you trust your source)
Cream Cheese (Brick so that you can slice into strips)
Green Onion
Cucumber
Rice
Seaweed Wrap
Rice Wine Vinegar
Wasabi
Soy Sauce
Pickled Ginger
STEPS
Step 1) Cook Rice
Step 2) Chop all veggies into long thin slices

Step 3) Chop all the Crab into very small pieces and add Mayonnaise until there is enough to make it easy to form (1-2 teaspoons)

Step 4) Lay out one seaweed wrap. Cover 3/4 of the wrap closest to you with a thin layer of rice, pressing firmly
Step 5) Place a row of meat/vegetables two or so inches into the rice.

Step 6) Roll the edge of the wrap closest to you away, covering the meat/vegetables. Tuck the edge in and pull it back toward you while pressing down. Keep pressing and pulling as you roll. Leave a bit of the wrap unrolled. Use the vinegar to wet the remaining so it will stick when you finish rolling.
Step 7) With a shirt knife cut in the middle of the roll. Place the (not) two parts of the roll next to each other with the cut edges aligned. Continue cutting the roll into one inch segments while being cautious not to smash the roll.

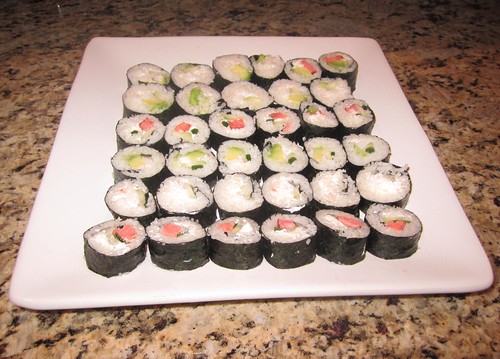
Step 8) Place the pieces on a pretty plate and admire your creation. Eat with wasabi, soy sauce, and ginger if you choose.
This was a fun culinary adventure. I am the type of person who is fine with following a recipe that tells me how much of each ingredient is needed and having the steps laid out for me when trying a new dish. However, this was nothing like that. Making Sushi was care free and dun. The more rolls we made the more we switched things up. What started out as California and Philadelphia rolls turned into 'lets try this' roll with both types of no fish , some vegetables here and some here.
I enjoyed making Sushi and can't wait to do it again and become better at rolling. Because i am terrible. My rolls were what would be equated to a BIG MAC sushi rolls.

Thanks Ami